
How to set-up
・ Network Settings
Tap [Settings] on the application screen and create the network settings. Utilize the standard network settings for the Android devices used.
・ SmartSignOn setting
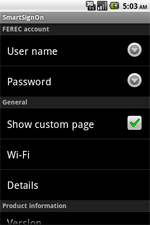
Tap [SmartSignOn] > Menu button > [Settings] on the application screen. (see image 1)
If you want to display FEREC Custom page immediately after Log-on, you need to make sure [Show costom page] part is "ON". (
Note that default value is "ON".)
The settings under [Details] on the general menu do not need to be changed if there is no problem in particular. Set the necessary information according to the method of use.
 |
| image 1 |
|---|
・ FEREC account setting(Automatic FEREC Detection)
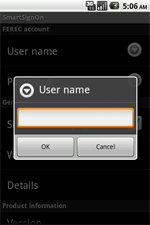
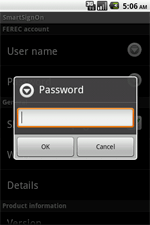
Tap [User name] or [Password] on the application screen, then enter the user name and password for the FEREC account.(see image 2 and 3)
 |  |
| image 2 | image 3 |
|---|
・ Auto Wi-Fi connection
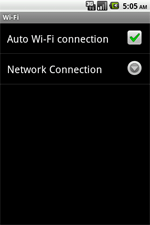
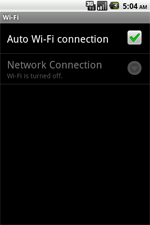
Tap[Wi-Fi] > [Auto Wi-Fi connection]on the application screen to make sure Auto Wi-Fi connect function is "ON". (see image 4)
(Note that default value is "ON".)
Auto Wi-Fi connect function will automatically connect to specified network when the network is unconnected. Also, access FEREC without alter Wi-Fi settings if it is already connected to other networks.
※ For Airplane Mode, display message and disconnect FEREC without Auto Wi-Fi connection setting.
※ Auto Wi-Fi connection setting will be failed if you try to use Auto Wi-Fi connection immediately after switch OFF Wi-Fi connection manually OR
under unstable Wi-Fi network environment.
 |
| image 4 |
|---|
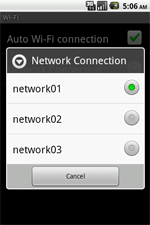
Tap[Network Connection]and then select Network Connection(Wireless AP).(see image 5)
Default value is always top of the Wireless AP list.
In order to select Wireless AP, Tap[Settings] > [Wireless and Network]on the application screen and then make sure Wi-Fi is "ON".
If Wi-Fi is inactive, you can not select Wireless AP. (see image 6)
 |  |
| image 5 | image 6 |
|---|
・ Details*
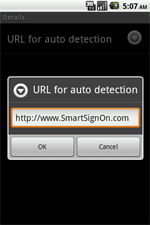
Tap [Details] > [URL for auto detection] on the screen and set the URL for automatic detection.(see image 7 and 8)
SmartSignOn accesses the URL for automatic detection and automatically detects FEREC. When using the device in an environment with no Internet connection, change the URL to the site to be used after FEREC authentication.
* Note that these settings do not need to be made unless there is a problem when using the device.
 |  |
| image 7 | image 8 |
|---|
How to use
・ Log on/Log out button(center of the screen)
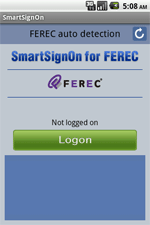
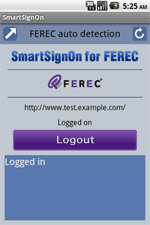
Tap [Logon] button for FEREC authentication. (see image 9)
For Log out, tap [Logout] button.(see image 10)
When you successfully log on, you will see:
- Display FEREC Custom page if the Auto custom display area is valid.
- If you have already pre-set your screen (using FEREC action settings), the screen will be displayed.
- If you have already pre-set your Client information (using FEREC action settings), the client information will be added on the URL of the displayed screen.
For more details about action settings (of FEREC), please read FEREC instruction manual.
・ Action button(upper left side of the screen)
You will see same operation When you Tap [Logon] button for FEREC authentication and then successfully log on.
・ Refresh button(upper right side of the screen)
Keep displayed-screen up-to-date through FEREC.
 |  |
| image 9 | image 10 |
|---|
Release Notes
・ SmartSignOn for FEREC Ver.1.3.0
・ SmartSignOn for FEREC Ver.1.2.0
・ SmartSignOn for FEREC Ver.1.1.0
Contact Information
Any inquiries/requests for the Applications or Enterprise Support
E-mail:
Question about FEREC
E-mail:


